February 26, 2014

TpT Sale, Jamberry, and Giveaway

                                                                                                 (Image credit: Rachel Lamb)

I will be participating in Teachers Pay Teachers "3 Million Teachers Strong" sale on Thursday and Friday! My whole store will be 20% off on those two days, and TpT will be kicking in an additional 10% savings. To get the additional 10% off, make sure that you enter the promo code TPT3 when you check out!

In other news, I recently became a Jamberry Independent Consultant! I'm loving my Traverse and Leopard Jamberry Nail Wraps! There are over 300 different designs to choose from....So many to try!

If you'd like more information about Jamberry Nail Wraps, check out the tabs on my Facebook page. If you'd like a FREE sample to try yourself, click here!


And, just because....I'd thought I'd have a giveaway.  It includes:

1. St. Patrick's Day Language Arts Activities set

St. Patrick's Day Language Arts Activities

2. Poetry Analysis Booklet

Poetry Analysis Booklet


3. Using Evidence for the Text to Support Your Answers Poster Set!

Using Evidence from the Text to Support Your Answers-Poster Set


February 22, 2014

Crafting Connection's 2,000 Follower Giveaway

My buddy Deb (from Crafting Connections) has just hit two huge milestones. She has 400 followers on Bloglovin and 2,000....Yes, 2,000 followers on Teachers Pay Teachers!!!  To celebrate, Deb is having a giveaway on her blog.  There are 15 chances to win!  I have donated any one item from my store (winner's choice) as a prize.  Make sure you stop by for a chance to win!!!  Congrats, Deb! :)


February 16, 2014

Poetry, Poetry, Poetry!

As I mentioned in my last post, we used the mentor text "Heartbeat" to start our poetry unit.  After we wrapped up that novel, we began our poem analysis and create our own poems!

Analyzing Poetry

Well, the biggest bummer in my classroom right now is that my Smart Board died (like at the beginning of January).  Yes, the fan failed....And, I'm still waiting for it to be fixed. So, luckily, I have a projector, but it's still not an ideal situation.  Anyways, when we began analyzing poetry, I created a booklet to use with my students (which I posted on TpT).  I projected the poem "Bliss" on the screen in my room, and we practiced going through the text dependent questions together.  I wanted to create free verse poems with rigorous questions to prepare my students for their state test! While we went over the answers as a class, students recorded them in their copy of their poetry books.

Each student had his/her own booklet to work in.  After the first day, students would go through the remaining poems with a partner, and later on their own.  We would always go over the correct answers as a class.
 Here is a sample of what a student's booklet looked like inside...
 One of my students brought in his favorite poetry book, Winter Woes.  With the weather lately, it was very timely!  I love when my students get excited about what we are learning and bring in items to share with the rest of the class! I had never heard of Winter Woes, but it was very cute!  It got some chuckles out of my 5th graders.


Note: The poem "Bliss" and a blank copy of a poetry book (see below) are a FREEBIE in my TpT store!

Poetry Freebie

Writing Poetry

Now, I didn't want to kill my students' love of poetry by making them analyze poems 24/7.  So, we would analyze one to two poems a day.  The remaining class time was spent on creating our own poems!  I must say, I was SUPER impressed with my students' poems!  Since I taught them last year, I was able to comment on the progress they'd made as poets.  Here is a picture I posted on my Instagram account showing the hallway outside of my classroom.


I had a hard time selecting poems to include in this post.  I am not exaggerating (no hyperbole here)!  I just picked a few of the amazing poems my students created.  I was proud of their word choices, including their use of figurative language.  They did a nice job of incorporating repetition in their poems too.

The poem I wrote called "Down from the Sky" inspired a lot of my students to write poems from different perspectives (see the roller coaster poem at the end of this post).


Now that you've seen some of their work, can you tell why I'm such a proud teacher!?!?! :)


Classroom Freebies Manic Monday

February 08, 2014

Heartbeat-Poetry Mentor Text

We finished the figurative language unit that we had been working on since we got back from break, and we made a seamless transition into our poetry unit.  Every year, after we review the characteristics of poetry (using my Poetry Unit Bundle), I like to use a novel written in poems to provide some poetry inspiration for my students.  Since I used my "go to" novel, Love That Dog last year (and I have the same students this year), I had to find another novel. Luckily, after some research online, I found a fabulous poetry novel (is that even what they're called?) ...Heartbeat!  Heartbeat was written by the same author as Love That Dog, Sharon Creech.

What is Heartbeat about?
Heartbeat is about a girl named Annie who is dealing with three big issues in her life: 1. Her mother being pregnant, 2. Her grandfather having Alzheimer's, 3. Her relationship with her friend Max (and their love of running). Creech jumps back and forth between these three issues throughout the poems in the novel.  

Why do I love Heartbeat?
1. Well, the main reason I love Heartbeat is because it provided my students with excellent examples of free verse poems!  It even inspired me to try my hand at free verse (see below for a freebie). 

2. Creech does a fantastic job of including figurative language in her poems.  There are so many examples of similes, metaphors, onomatopoeia, etc.  

3. The book provides an excellent example of symbolism.  We hadn't talked about symbolism yet, so when we got to the end of the novel, it was a great time to cover that concept!  During the novel, Annie is given an assignment by her art teacher to draw the same apple every day for 100 days.  She notices the changes in her apple, and the last poem ends with a description of the last picture, which is a seed.  You'll see where the symbolism ties in in just a second...My students and I had a discussion about the cover/back cover of the novel.  There's an apple on the front and a core on the back. You realize by the end of the novel that the apple seems to represent her grandfather's decline in health, and the seed could represent new life, or her baby brother, Joey.

*We later tied in this new concept of symbolism to the poem "The Road Not Taken" by Robert Frost.  I told my students that it was a tougher poem for 5th grade, but some students were able to figure out that the roads mentioned in the poem represented choices/decisions in life.

How did I use Heartbeat in my classroom?
We started each class by reading about 25 pages of the novel.  Therefore, it took us eight days to read. Since it is written in poems, it didn't take very long (maybe 10-15 minutes/day). Our purpose for reading was enjoyment, so I didn't want to have my students analyze the poetry too much.  Before we read the novel, we discussed what Alzheimer's was, since it isn't expressly referred to in the novel (though it can be inferred). We also reviewed the main events from the previous day's reading and discussed symbolism. This past week, we did move on to analyzing poetry (which will be featured in my next blog post).


Click HERE for a great resource for Heartbeat (made by Scholastic).

Here is a freebie that contains a free verse poem I wrote.  I will be writing another blog post soon that covers how we analyzed poems in class, as well as my students' progress on their own poetry books!


Also, I recently joined Instagram...@middlegradesmaven!

Must-Read Monday Linky


January 26, 2014

Take a Hike Product Swap Giveaway

Are you up for an adventure this week?  A number of fellow intermediate teacher-bloggers have joined to provide you with blog-hopping fun this last week of January.  Perhaps snow covers the ground outside where you are reading this from, making a real outdoor hike out of the question...so we thought we would offer you a trail to "hike along" from the comfort of your couch!


Back in December, I was partnered up with Erin from I'm Lovin' Lit! I was ecstatic to be partnered up with Erin because we are both language arts teachers, and I have bought A TON of her items on TpT.  I felt like I was partnered up with a celebrity, which I tried to explain to my husband...haha

Erin and I each selected an item from each other's stores that we could use in our classrooms this month. We both ended up picking figurative language activities!  I chose Erin's "Figurative Language Stories-Close Reading for Common Core Grades 4-8" set.  The set includes six original stories written by Erin, as well as four different activities that students can complete to demonstrate their abilities to 1. identify figurative language, 2. analyze figurative language, 3. Modify/Create their own figurative language, and 4. Revise figurative language. The flow of the activities builds in complexity. I was extremely pleased with how well the items in this product worked with my class's review of figurative language!

Let me start by saying that my students had some prior knowledge on the following seven types of figurative language:  similes, metaphors, personification, idioms, onomatopoeia, hyperbole, and alliteration. Erin's figurative language set covers all seven of those types of figurative language, as well as allusion.

With all of the other activities I had planned for this three day school week, I used Erin's figurative language stories in a "gradual release" type model.  Each step was done on a different day (as seen below).

Day 1

On our first day using Erin's figurative language stories, I thought it would be a good idea to practice how to complete two of the figurative language activities as a class, so that students would be able to complete them on their own by the end of the week. We focused on the first two activities: identifying the figurative language in the story and analyzing it.  I thought that the easiest way to complete activity #1 was to color code the seven types of figurative language that we were going to identify (As I mentioned above, we hadn't studied allusion, so we just skipped that in our practice).  I created a key on the board (similes=blue, metaphors=red, personification=yellow, idioms=green, hyperbole=purple, alliteration=orange, and onomatopoeia=brown), and my students got out their colored pencils and crayons.  We went through the text together and identified the examples of figurative language. While I was highlighting the examples on the Smart Board, students colored them at their desks.

After we practiced identifying figurative language, we completed the second activity in the set to analyze the figurative language in the story.  The second activity requires students to understand the meaning of the examples of figurative language.  There are multiple choice questions and a short answer question on the bottom of the page.


Day 2

On the second day of using Erin's figurative language set, I broke my students up into four groups.  Before the students got into their groups, I gave them some time to read and start identifying figurative language on their own, using the same color coding system from Day 1.  Then, they met up in their groups and went over what they had found together.  I reminded the students to help each other out. That if one students didn't have an answer they had, they should help explain why their answer was right.  I gave the students an example that if one student labeled an example as a simile, and the other as a metaphor, they should discuss why they came up with their answer and try to come to a unanimous decision.  Once the students finished identifying the figurative language in their stories, they brought up their answers to me, and thanks to Erin's answer keys, I was able to quickly check their work.

Once they were given an "okay", they were told to work on the analyzing figurative language page together.  I checked their responses when they were done.  The last activity they did in their groups was to create their own examples of each of the seven types of figurative language, share them with their groups, and go around explaining what their examples meant (not including alliteration and onomatopoeia, since you can't really explain the meaning of those).


Day 3

We have been studying figurative language since we got back from winter break, so on the third day of our short week, my students were given an assessment.  There were multiple parts to the assessment, but the first page was the last figurative language story from Erin's set.  Once again, they colored the different types of figurative language in the story, just as we had practiced. The other pages of their assessment required them to analyze and create examples of figurative language.  I'm looking forward to grading my students' assessments to see how they did! :)

She also has some other figurative language freebies: simile worksheet and simile lesson

Now, to help with your exercise for the day, here's what you need to know about our hike and giveaway!

Hiking Tips 

-Start anywhere along the trail!


-Along the way, stop by each blog and read about the resources swapped between bloggers.

-Enter to win the resource that is featured at each blog in the raffle below (the same raffle is at each blog, so you can just add to your entries as you go!). While you are at each blog, if you’re not a blog follower already, sign on to follow!  (You can earn bonus entries for following all blogs once you unlock the additional entries.)

-The raffle is open until midnight on January 31, so feel free to take a break from your hike, rest up, and finish it later! 

One winner will receive the entire set of resources being featured by all 14 collaborating bloggers AND a $25 TpT gift certificate! 


Here’s the list of blogs to "hike" to: 

Swap Stop A


Swap Stop B 


Swap Stop C 


Swap Stop D 


Swap Stop E 


Swap Stop F 


Swap Stop G 


http://www.rafflecopter.com/rafl/display/dceb6232/" rel="nofollow">a Rafflecopter giveaway


 Well, friends, settle in on your couch and grab the granola. It's time to get your hike on! :)

January 12, 2014

Book Projects Galore Giveaway

I have my students complete a book report project every quarter. I switch up the genres they can choose from for each project, so they are exposed to different genres throughout the year. My students finished presenting their 2nd book report last week, and I will be introducing the third book report, on an informational book, at the end of this week. I love giving students the opportunity to be creative while showing their comprehension of a text. I have spent a lot of time creating directions that align with the Common Core State Standards, so they are even more rigorous than the book projects I have used in the past. I must say, I have been very impressed with the products my students have created! 

 I have used the 10 fiction book reports below to differentiate my students' assessments. I split the 10 book report options into two different sets. That way, I can use the options for two quarters worth of book reports. It also gives all of my students the option to choose a book report that best reflects their learning style and interests. The ten projects include: a mobile, music playlist, shadowbox, comic strip, video, scrapbook, collage, brochure, plot diagram (poster)and an alternate ending.

To make the book projects as user-friendly as possible, I created an editable version of both sets, so you can change/add anything you would like to the directions I already provide. 

Since I've finally gotten around to posting some of my book projects, I thought it would be fun to have a giveaway. The winner will receive a copy of the 10 Fiction Book Projects set and a copy of my Nonfiction Informational Book Project set for free! Good luck! :)


January 05, 2014

Figuratively Speaking GIVEAWAY!

Hi there!   Greetings from Deb in snowy and cold Iowa!   Huh?!  You may be wondering, Deb?! Where’s Kathleen?!  Well, Kathleen can be found over at my blog – Crafting Connections.  We decided we needed a little “excitement” these early days of January, so we decided to swap blogs!  We thought our readers might enjoy getting to meet another upper elementary teacher-blogger in the process. So, stick around and read on… (We’ll make it worth your while in the end!)

First, let me tell you just a little bit about myself.   Personally, I am married to my best friend, and I am the mother to two beautiful little girls- Kayla is nine years old and Brooke is six.


When I have free time, I like to hike (although I don’t get to do so very often…. my side of Iowa is a little on the flat side) and bake.   Here’s a photo of the birthday cake for Jesus that my girls and I made.  I made the cake, and my girls decorated it.  :)


Professionally, I am an ESL teacher in a school district in northeast Nebraska, and I am in the middle of my 16th year of teaching.   For the most part, I co-teach with several third, fourth, and fifth grade teachers.   I love this, as it allows me to provide support to many students and collaborate with some amazing teachers at multiple grade levels as well!  If you’ve visited my blog or been by my store, you’ll know that I LOVE to create “craftivity” resources… and the only thing better than creating them is seeing first-hand how students are engaged by them, enjoy them, and learn from them.  (Check out a post I wrote earlier this year about the benefits I find from doing craftivities with upper elementary students.)

Besides craftivities, I also really enjoy creating PowerPoint lessons.   Where craftivities employ hands-on, tactile learning opportunities, PowerPoint lessons employ important cognitive learning opportunities.  I have a hunch you’ll agree that both strategies have their place in our upper elementary classrooms.   I’ve found that a visually engaging PowerPoint filled with lots of examples is a powerful tool!  I have seen the light bulb come on for students SO many times when I present a visually engaging PowerPoint … and especially when I then follow it up with a hands-on craftivity to “seal in” what students have just learned cognitively.  Ahhh… I live to see that “AHA!” moment!

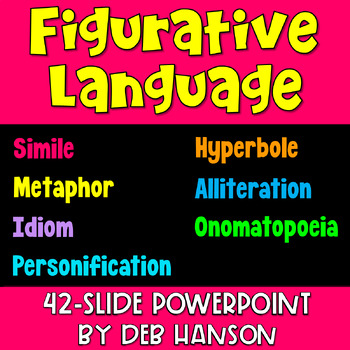
So, let me go back to Kathleen briefly.  A few weeks ago, I decided that my Figurative Language PowerPoint needed a “facelift”, shall we say – I think my “design skills” have improved a bit over the last year - and while I felt it had great “bones”, I thought it would benefit from a few design tweaks. (I’m really proud of how it turned out!)


Once I finished it, I decided to go on a TpT hunt for a great set of figurative language posters – that’s where I found Kathleen’s set (right).  I decided to connect with her to see if she wanted to team up to do a giveaway of my Figurative Language PowerPoint and her Figurative Language Poster set!  Suffice it to say that she was on board… and here we are today!  (She was actually just finishing up a Figurative Language Interactive Notebook resource, and I think that’s what she’s choosing to blog about over at my blog today…)

Anyway, I love the weeks when we focus on figurative language. I think it’s probably my favorite ELA topic to teach!  There are just so many fun things to do, and it’s SO fun to hear statements like, “Mrs. Hanson, check out the personification I found when I was reading yesterday!” when I walk into the classroom!   I thought I would briefly share how my co-teachers and I intend to go about teaching figurative language this year in 5th grade.
  • We will start by presenting the Figurative Language PowerPoint - we want to start with a brief overview of the seven literary devices we will be covering in fifth grade.
    • Similes
    • Metaphors
    • Alliteration
    • Onomatopoeias
    • Personification
    • Hyperboles
    • Idioms
  • We will go through each literary device independently, using Kathleen’s Figurative Language Interactive Notebook activities as guided practice during class and some of my worksheets as independent practice.  We will also hang Kathleen’s Figurative Language Posters on the wall as we introduce each literary device.
  • Students will record literary devices that they find during independent reading in my Figurative Language Flipbook.
  • We will play lots of games to review previous literary devices taught as we progress through the unit!  For example, after we have covered similes and metaphors, the next day we will probably play “I have… Who has…? : Similes and Metaphors” at the beginning of the class period before we begin teaching alliteration.
  • After all of the literary devices have been introduced, we will do some review activities, including my Figurative Language Task Cards and Figurative Language Craftivity.
  • We will assess at the end of the unit by using the review activity in Kathleen’s Figurative Language Interactive Notebook packet. 

Between Kathleen’s two resources and the resources I had already made (and are in my bundle), we determined that we would not even be able to use all of the materials we have!!  However, I suppose that is okay- we even decided that we might be able to use some of the materials for reteaching and/or a review before those spring standardized tests.

I promised a raffle giveaway in the blog title... here it is!   One winner will receive my Figurative Language BUNDLE - AND the resource that Kathleen is featuring over at my blog... Enter at either blog!


a Rafflecopter giveaway

Finally, thank you so much for reading today - even though I'm not Kathleen. :)   I hope my post today will lead you to consider following my blog as well!